A grow tent looks simple from the outside — fabric walls, a door, maybe a window. Inside, every part works together to control light, airflow, and humidity. Zazzy Grow Tent builds around five core components that experienced indoor gardeners inspect first: the steel frame, Mylar interior, vent ports, observation window, and tool bag. Understanding what each piece does helps you assemble faster, troubleshoot leaks, and know when a replacement part beats buying a whole new tent.
This guide walks through anatomy from the ground up. Cross-reference our assembly instructions when you are ready to build, and read grower reviews to see how these parts perform in real rooms over multiple harvests.
Why parts matter
Cheap tents fail in predictable places: sagging poles, peeling Mylar, vents that never seal, zippers that snag after month two. Zazzy targets the parts that absorb daily stress — the skeleton that holds your gear, the reflective skin that returns photons to canopy, and the ports that let air move without bleeding light. When you know the role of each component, you spot weak points early instead of discovering them mid-flower.
Parts also determine upgrade paths. A solid frame accepts heavier LED fixtures and carbon filters. Quality vent ports mean you can scale from a passive intake to an inline fan without re-cutting duct holes. The observation window saves you from opening the main door during dark periods — a small detail that protects yield. None of these are luxury extras; they are the working hardware of a controlled environment.
Steel frame basics
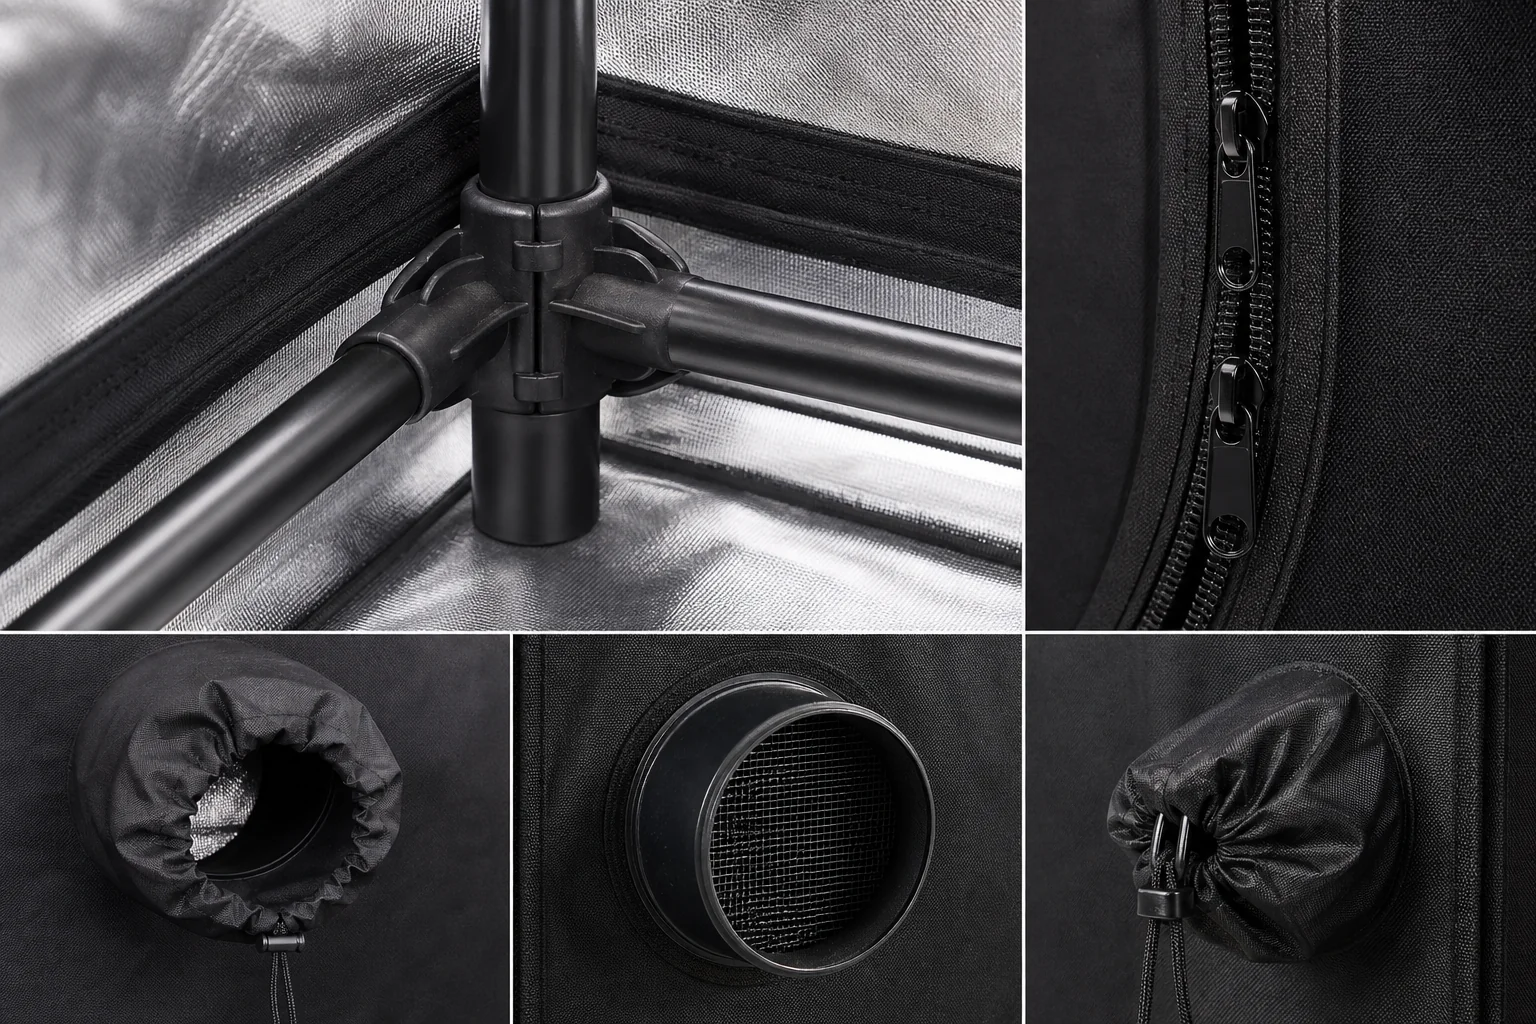
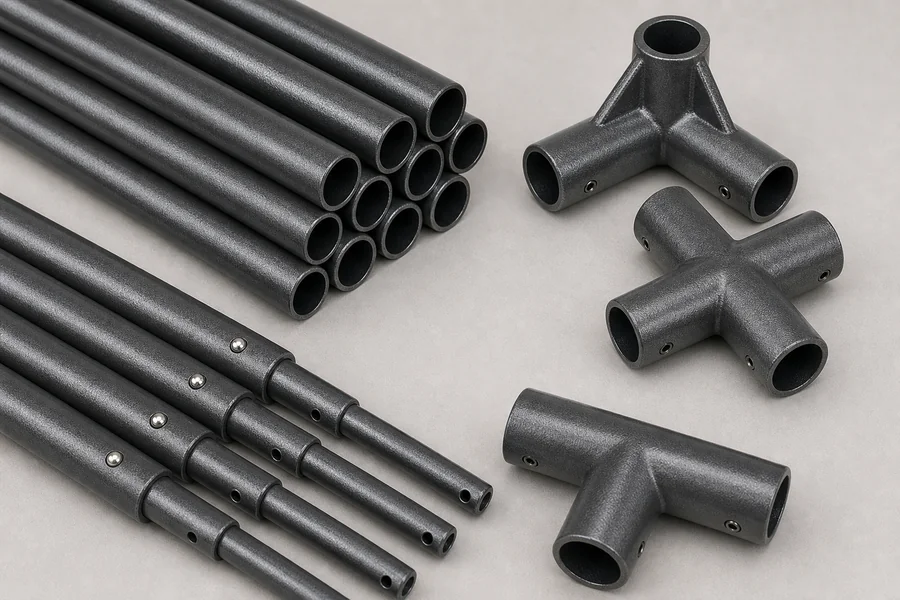
The steel frame is the tent's load-bearing structure. Zazzy uses powder-coated steel poles with push-fit or click-lock connectors depending on size. The 110 lb rating matters because modern LED panels, carbon filters, and ducting add up fast. A 4×4 setup with a filter and light can exceed 40 lbs before you hang circulation fans.
Corner pieces distribute weight across vertical posts. Mid-level crossbars on larger tents prevent wall bowing when negative pressure pulls fabric inward. Inspect connectors for burrs before assembly — a smooth fit keeps poles seated under vibration from fans. If a corner flexes after months of use, replacement connector kits are cheaper than risking a collapsed light during flower.
Frame geometry also defines internal usable space. Measure pole-to-pole inside dimensions, not just the size printed on the box. Zazzy offers 2×2, 3×3, 4×4, and 4×8 footprints; each scales pole diameter and connector count to match expected loads.
Mylar interior role
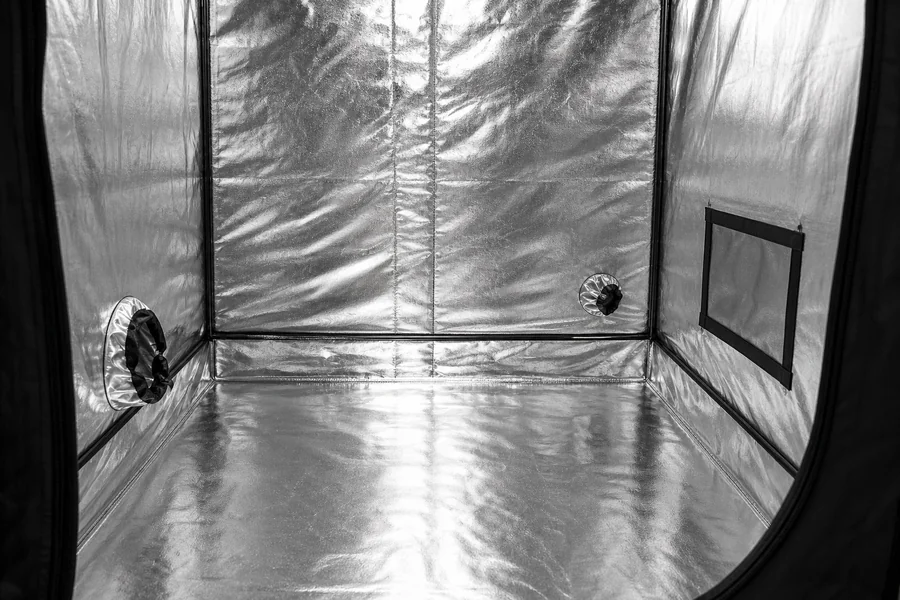
The 600D Mylar interior serves two jobs: reflectivity and containment. The 95% reflective rating bounces stray photons back toward leaves, improving efficiency especially on lower canopy tiers. Thicker 600D fabric resists punctures from trellis clips, stakes, and occasional tool contact better than thin budget liners.
Mylar also helps hold humidity and temperature stable by reducing exchange through walls. Pair reflective walls with a floor tray — sold separately on some bundles — to catch runoff and prevent moisture wicking into carpet or concrete. Wipe interior panels between cycles to remove salt residue; buildup dulls reflectivity over time.
Seam quality matters as much as material. Double-stitched corners at pole pockets take stress when you tension the shell. If you see light pinholes along a seam, patch with interior-rated tape before flipping to 12/12 so leaks do not stress photoperiod-sensitive plants.
Vent port function
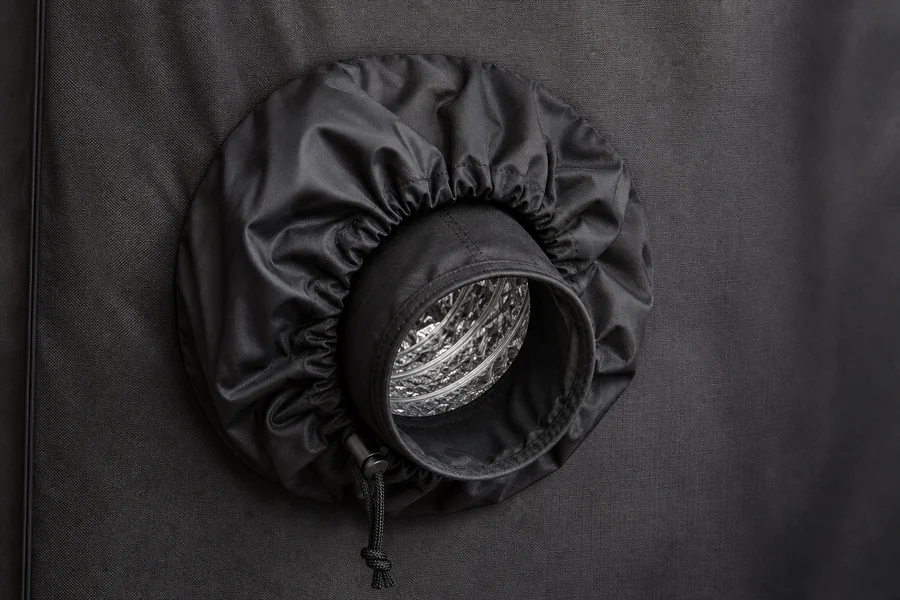
Vent ports are the tent's lungs. Zazzy places multiple ports so you can run intake low and exhaust high — the classic stack effect that moves warm, CO₂-depleted air out while drawing fresh air in. Drawstring closures wrap snugly around ducting diameters from four to eight inches on most kits.
Seal matters for light proofing. A loose port leaks photons during dark hours and can trigger herm issues in sensitive genetics. Tighten drawstrings evenly, then add a secondary sleeve if you run oversized ducting. Passive intakes can use a port with screen mesh; active exhaust should pair with an inline fan matched to tent volume.
Redundancy helps: extra ports let you add a circulation duct or backup exhaust if your primary fan fails mid-cycle. Label each port's role on the tool bag card — future you will thank present you during a rushed filter swap.
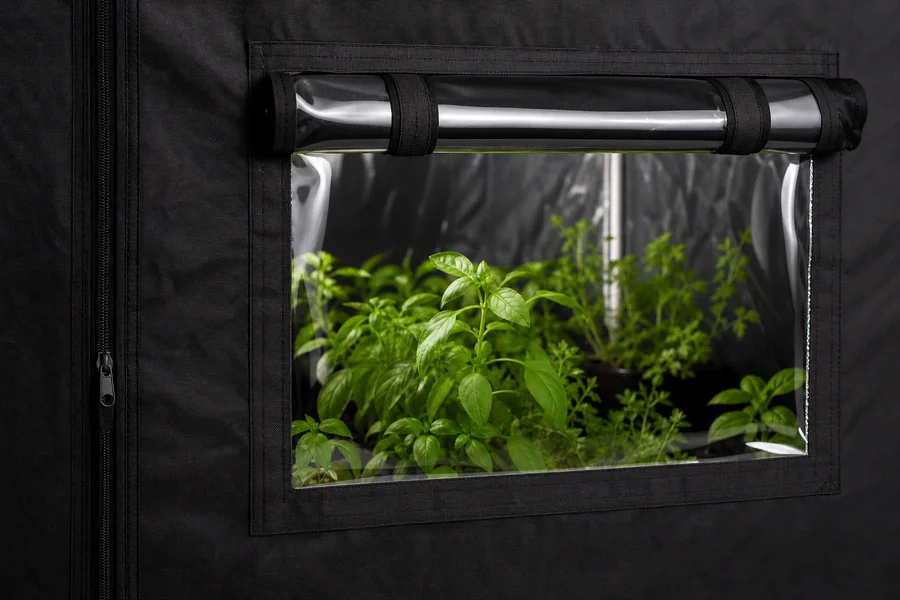
Observation window use
The observation window is a lightproof flap over clear material — usually reinforced vinyl — set at canopy height on many Zazzy models. Peeking through the window lets you check leaf color, pest pressure, and moisture without unzipping the main door. Every full open dumps conditioned air and risks light strike during sleep hours.
Treat the outer flap like a second door: close it fully before lights-off inspections. If the flap creases and leaks, rotate the fold line weekly so one spot does not fatigue. Clean the inner panel with a damp microfiber cloth only; harsh cleaners can cloud the view.
Windows are especially valuable in shared living spaces where opening a large tent door draws attention or lets odor escape. They are not a substitute for environmental monitors — still use a hygrometer — but they cut unnecessary disturbances dramatically.
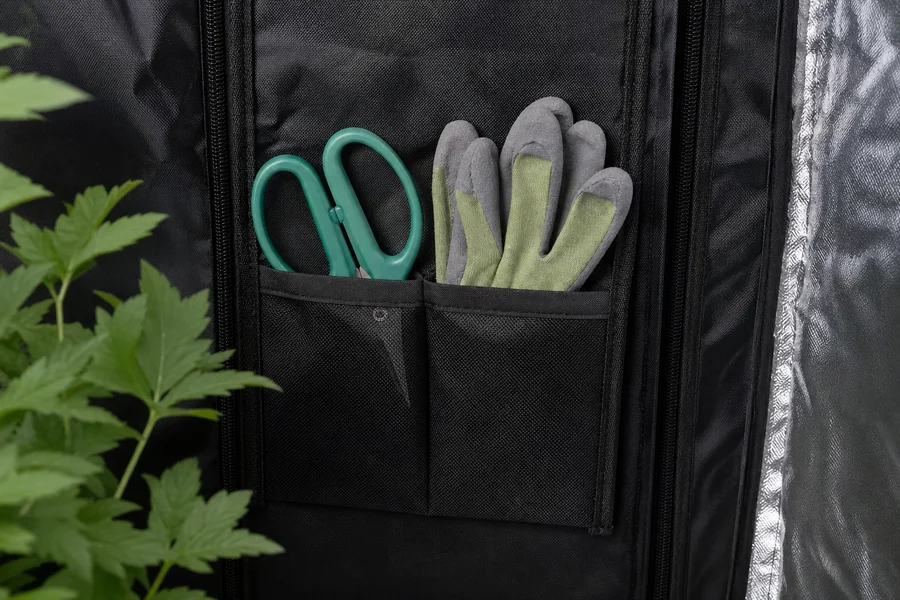
Tool bag purpose
The included tool bag seems minor until your first teardown. Spare connectors, extra drawstring toggles, pole labels, and zip ties stay in one place instead of rolling under furniture. Zazzy sizes the bag to fit inside the collapsed tent shell for storage between grows.
Use the bag to stash your assembly manual printout, a small LED headlamp, and nitrile gloves for sticky trichome weeks. Add a Sharpie to mark pole lengths — reassembly speeds up when you do not guess which tube belongs in which corner.
Zippers and doors
Beyond the five headline parts, lightproof zippers on the main door and service flaps deserve attention. Zazzy uses overlapping zipper tracks with inner flaps to block photon leaks. Run zippers slowly past corners; forcing a tight turn chips teeth.
Lubricate with dry zipper wax if action stiffens from resin dust. Never pull a stuck zipper hard — back it up, clear debris, retry. A failed zipper is a replaceable part on many tents; catch fraying early.
Floor tray note
Floor trays are not in the five-card grid above but pair with every serious setup. The tray catches nutrient runoff, keeps pots level, and protects flooring. Zazzy trays are sized to each footprint — verify lip height if you flood to drain. Trays slide in after the frame is up and before you clip the outer shell.
Maintenance schedule
Between cycles, break the tent down, vacuum interior Mylar, and inspect poles for rust spots in humid climates. Tighten connectors that loosened from fan vibration. Replace vent drawstrings if they lose grip — they are pennies compared to a light-stress event.
Store collapsed fabric in a dry bin, not a cold garage floor. Condensation plus folded Mylar invites mildew smell that is hard to wash out. Keep the tool bag with the bundle so parts do not scatter.
Replacement vs upgrade
When a single part fails, match the footprint before ordering. A 4×4 frame kit does not fit a 3×3 shell. Replacement Mylar liners are rare — most growers patch small tears or retire the tent if walls are compromised. Frames and vent hardware are the most common long-term spares.
If you outgrow a 2×2, upgrading the whole tent often beats Frankensteining mixed parts. Sell the small unit with its tool bag intact; buyers value complete kits. Check current listings via the cards above when you need a part fast.
Parts and performance
Every component on this page influences yield indirectly. Reflective walls raise usable light. Solid frames let you hang lights closer to canopy without hot spots from sag. Sealed vents stabilize CO₂ and odor control. Observation windows reduce stress events. The tool bag keeps you organized enough to fix small issues before they become harvest problems.
Start with the featured parts, follow our assembly guide, and return to the homepage when you are sizing a full Zazzy tent for your room.